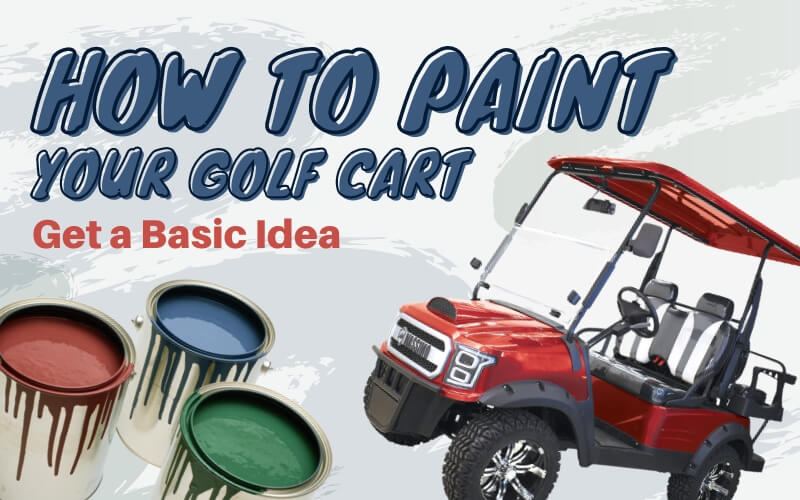
Ever found yourself gazing longingly at those shiny new golf carts, only to be brought back to reality by the hefty price tags? Well, I’ve got some good news for you!
Believe it or not, you don’t need to be an artist or a mechanic to transform your old, tired vehicle into a gleaming ride that turns heads on the course. With a little patience and the right techniques, you can give your vehicle a makeover that rivals the pros!
I remember the first time I laid eyes on my old golf cart. It was love at first sight, despite the faded paint and worn-out seats. I knew that beneath the surface, there was a diamond in the rough just waiting to shine. And so began my customizing journey into the world of golf cart makeovers… But more on that later. For now, let’s get started on your transformation!
If you’re ready to roll up your sleeves and breathe new life into your trusty golf cart, you’ve come to the right place. I’m about to share a step-by-step guide that will show you how to paint your golf cart like a pro, quickly and easily.
Safety First!
Safety is paramount when undertaking any painting project, especially when dealing with vehicles. The painting process often involves the use of chemicals that can be harmful if not handled correctly. These chemicals, present in paints, primers, and solvents, can release fumes that are hazardous when inhaled.
Prolonged exposure or even short-term inhalation of these fumes can lead to respiratory issues, dizziness, and other health complications.
Protecting oneself from these harmful chemicals is essential. Wearing appropriate protective gear, such as masks or respirators, ensures that one doesn’t inhale the toxic fumes. Gloves are crucial to prevent direct skin contact with these chemicals, which can lead to skin irritations or more severe reactions.
Safety goggles are also recommended to shield the eyes from any potential splashes or mist.
Furthermore, working in a well-ventilated area helps disperse the harmful fumes and provides a continuous supply of fresh air, reducing the risk of inhaling concentrated chemical vapors.
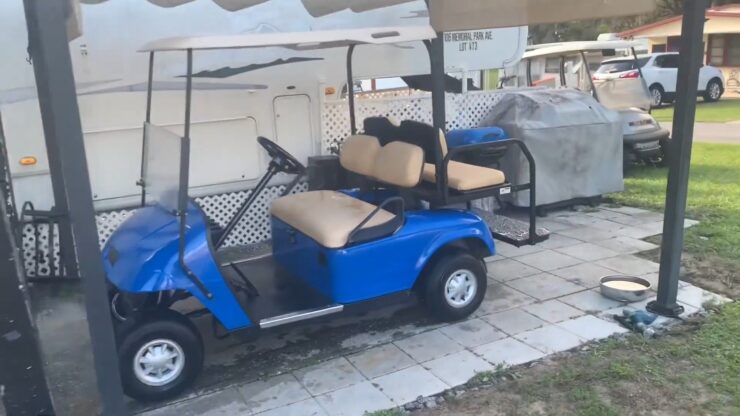
Clean Your Cart!

The preparatory stage of cleaning a vehicle before embarking on a paint job is a critical step that can significantly influence the outcome. Ensuring the surface is pristine is vital because any lingering contaminants, such as dirt, grease, or old residues, can hinder its ability to bond effectively.
If the surface isn’t meticulously cleaned, the paint may not adhere uniformly, resulting in an uneven finish or even causing the paint to lift or peel prematurely.
Furthermore, a spotless surface guarantees that the final appearance is sleek and devoid of flaws. Any residual debris or particles left on the vehicle can become trapped beneath the paint layer, leading to unsightly bumps or irregularities in the finish.
Such imperfections not only detract from the aesthetic appeal but can also weaken the protective qualities of the paint, making the vehicle more susceptible to external elements and wear.
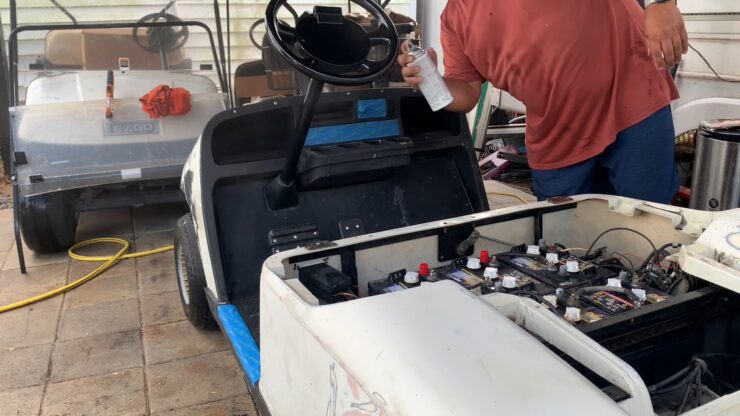
Strip The Cart Of All The Removable Parts
Stripping a vehicle of its removable components is a meticulous process that requires attention to detail and a systematic approach. Whether you’re looking to refurbish, repair, or simply clean, it’s essential to start by identifying all detachable elements.
From the seats and steering wheel to the smaller components like mirrors and lights, each part should be carefully removed and cataloged. Using the right tools and following the manufacturer’s guidelines can ensure that no damage is done during this process.
Once all the removable parts have been taken off, it provides a unique opportunity to inspect the core structure and mechanics of the vehicle. This stripped-down state allows for a thorough examination of the chassis, wiring, and other integral systems.
It’s also an ideal time to clean and maintain areas that are usually hard to reach. After ensuring everything is in top condition, reassembling becomes a smoother process, ensuring that each component fits perfectly in its designated place.
Sanding Touches
Sanding is a crucial step in the process of painting a golf cart, and its importance cannot be overstated. Sanding prepares the golf cart’s surface by creating a smooth and even base. This ensures that the paint adheres uniformly, preventing unevenness or blotchiness in the final job.
Over time, a golf cart’s surface can develop scratches, dings, or other imperfections. Sanding helps in removing or minimizing these blemishes, leading to a cleaner and more polished finish.
Furthermore, sanding promotes better paint adhesion. Without proper sanding, the paint might not stick well to the surface, leading to peeling or chipping in the future. It also aids in the removal of old paint or finish, allowing the new color to bond directly with the cart’s material.
Sanding opens up the pores of the material, be it metal or plastic, ensuring that the primer and paint penetrate deeper, resulting in a more durable and long-lasting finish. In essence, the touch of sanding is fundamental to achieving a professional and lasting job on a golf cart.
Don’t Skip the Primer
Skipping the primer is a massive mistake. Here are a couple of reasons why it plays a pivotal role when painting a golf cart:
- Adhesion: Primers are specifically formulated to provide a surface that the paint can adhere to effectively. Without a primer, paint might not stick to the cart’s surface uniformly, leading to peeling or flaking over time.
- Durability: Using a primer ensures that the paint job lasts longer. It acts as an additional protective layer, shielding the paint from external factors like UV rays, moisture, and daily wear and tear.
- Smooth Finish: Primers help in filling minor imperfections or scratches on the golf cart’s surface. When paint is applied over a primed surface, it results in a smoother and more professional-looking finish.
- Color Vibrancy: A primer can enhance the vibrancy of the color. It provides a neutral base, ensuring that the paint’s color appears true and bright, without being affected by the original color of the cart.
- Protection: Primers also protect the underlying material of the golf cart, especially if it’s made of metal. Some primers contain anti-rust properties that prevent oxidation and rust formation.
- Cost-Efficiency: While it might seem like an additional expense, using a primer can save money in the long run. It often requires fewer coats of paint to achieve the desired color and finish when a primer is used, reducing the amount of paint needed.
Maintaining Your Masterpiece
Now that you’ve put in the hard work and your golf cart is looking like a million bucks, it’s crucial to keep it that way. Proper maintenance is key to ensuring your paint job stays fresh and vibrant for years to come. Here are some tips to help you do just that:
- Regular Cleaning: Just like you did before painting, regular cleaning is essential even after. Use a soft cloth and mild soap to gently clean the surface of your golf cart. Avoid harsh chemicals or abrasive materials that could scratch or damage the paint
- Protect from the Elements: If possible, store your golf cart in a garage or under a cover when not in use. Prolonged exposure to sun, rain, or snow can cause the paint to fade or chip over time
- Wax On, Wax Off: Consider applying a good quality automotive wax to your golf cart’s body. Not only will it give your cart a beautiful shine, but it also provides an extra layer of protection against scratches and the elements
- Prompt Repairs: Despite your best efforts, you might end up with a few scratches or chips in the paint. Don’t fret! Address these issues promptly with a small touch-up to prevent them from getting worse
- Regular Check-ups: Just like you’d take your car for regular servicing, do the same with your golf cart. Regular check-ups can help identify any potential issues early and keep your cart in top shape.
Remember, the key to maintaining your golf cart’s fresh look is consistency. Regular care and attention will ensure your golf cart continues to turn heads on the course for a long time.
After I painted my golf cart, I was so proud of it that I wanted to keep it in pristine condition. So, I started a routine of weekly cleanings and check-ups. It became a sort of ritual for me, a way to unwind and spend some quality time with my golf cart. And let me tell you, it was worth every minute. My golf cart still looks as good as new, and I couldn’t be happier!
FAQs
What kind of paint do you use on a golf cart?
Navigating the world of paints can be a bit overwhelming, with so many types and brands to choose from. But if you’re looking to give your golf cart a fresh coat, I’d recommend going with acrylic paint.
It adheres to plastic surfaces like a dream, and it’s much more budget-friendly than plastic fusion spray paint, which is the only other type that sticks as well.
What is the best paint for a golf cart?
Hands down, acrylic paint takes the trophy. It’s not only affordable but also has excellent adherence qualities, especially on plastic parts. So, if you’re looking to spruce up your golf cart without breaking the bank, grab a can of acrylic paint. You can always get more if needed.
How hard is it to paint a golf cart body?
I won’t sugarcoat it – painting a golf cart isn’t exactly a walk in the park, but it’s not rocket science either. It’s a moderately easy task, but be prepared for a bit of a mess. The process can kick up a lot of dust, which can be tricky to clean up and can stick to your fresh paint if not dealt with promptly.
So, keep those goggles on and clean as you go to keep the dust from ruining your hard work.
How many cans of spray paint do I need for a golf cart?
On average, you’ll need about three cans of spray paint for a golf cart. However, this can vary depending on the size and type of cart. As a rule of thumb, the larger the cart, the more paint you’ll need.
When I was painting my golf cart, I underestimated the amount of paint I’d need and ended up running out halfway through. There I was, with a half-painted golf cart and no paint. It was a rookie mistake, but one I learned from.
So, always make sure you have enough paint before you start – it’s better to have too much than not enough!
Final Thoughts
So, there you have it, folks – your comprehensive guide to giving your golf cart a fresh, new look. From safety precautions to the nitty-gritty of the painting process, we’ve covered it all.
Painting your golf cart is not your average DIY project. It’s a labor of love, a chance to breathe new life into a faithful companion.
And let’s not forget the sense of accomplishment you’ll feel when you take your newly painted golf cart for a spin on the course.
So, don’t be daunted by the task ahead. Embrace it, enjoy it, and most importantly, have fun with it. After all, every stroke of the brush, every spray of the can, is a step towards creating your very own masterpiece on wheels
Happy painting, and may your golf cart be the envy of the course!
A lifelong devotee of the sport, Kane Franco serves as a Senior Staff Writer for Florida Elite Golf Tour. His expertise, coupled with a genuine desire to assist golfers in selecting the optimal gear, has led him to oversee a team of writers dedicated to providing the most precise and insightful reviews and purchasing guidance.