
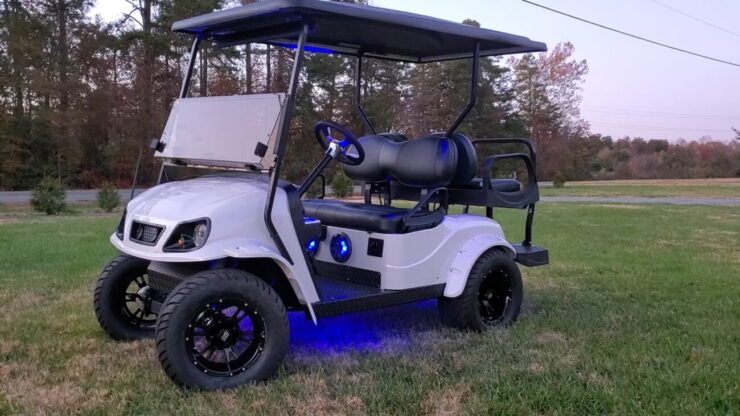
Over the years, I conducted various DIY projects, and one that I’m particularly proud of is wiring lights on a vehicle often seen cruising the greens.
I’ve spent a good amount of time tinkering with vehicles, and one of the projects I’ve recently tackled is wiring lights on a 48-volt golf cart. I know, it might sound a bit daunting at first, especially if you’re new to the world of golf carts or electrical work.
But trust me, with the right guidance and a bit of patience, it’s entirely doable. I’ve learned quite a bit through trial and error, and I’m eager to share my insights and processes with you.
So, whether you’re looking to add some flair to your evening rides or simply want to ensure safety during those twilight games, I’ve got you covered.
The Power System
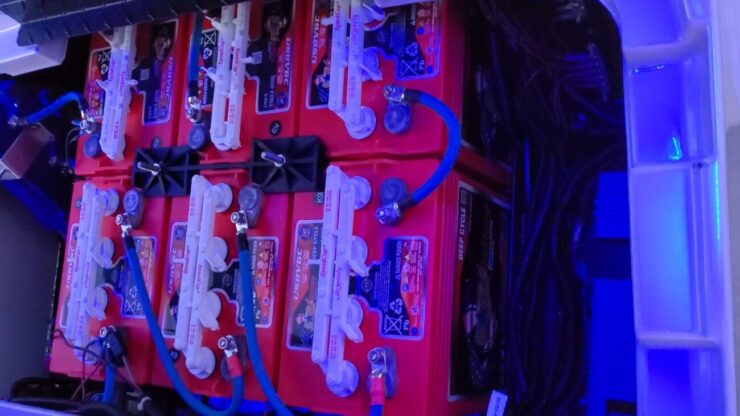
When we talk about a 48-volt golf cart, we’re referring to the total voltage of the batteries that power the cart. Golf carts typically use between 4 and 6 batteries, and the voltage of each battery contributes to the total voltage of the cart. It’s crucial to understand your golf cart’s power system, as it influences the performance, maintenance, and cost of your vehicle.
Most golf carts are electric, powered by a series of batteries. However, some models use gasoline. The voltage of the batteries in these carts can vary. You can usually find the voltage of a battery indicated on its label, but if it’s not, you can calculate it by counting the number of holes on the battery. Each hole represents 2 volts, so a battery with 3 holes, for example, is a 6-volt battery.
The most common total voltages for golf carts are 36 volts and 48 volts. Recently, the 48-volt golf cart has become more popular. A 48-volt golf cart typically uses eight 6-volt batteries to achieve this total voltage.
Gasoline-powered golf carts, on the other hand, can operate with a single 12-volt battery. Some newer models even use four 12-volt batteries. The perks of gasoline carts include:
- Can run continuously as long as there’s fuel in the tank.
- More horsepower enabling them to handle steep hills and heavy loads with ease
- However they also produce emissions and are noisier
Golf carts differ from everyday cars in several ways. For instance, the engine doesn’t start when you turn the key, but rather when you press the accelerator. This design results in less noise and lower energy or fuel consumption. Maintaining your golf cart’s batteries involves regular cleaning of the terminals and inspections to ensure there are no acid or liquid spills.
Importance of Wiring Lights
While golf carts may not come with lights as standard, adding them can significantly enhance the safety, legality, and convenience of your vehicle.
Whether you’re driving on public roads or navigating your property in the dark, lights are a crucial addition to your golf cart. Here’s why:
Compliance with State Laws
If you’ve some basic knowledge of car maintenance, by tracking a few easy and simple rules, you can easily equip your vehicle with all the lights you want to be able to legally drive them on the streets.
If you plan to drive your golf cart on public roads, it’s essential to know that most state laws require vehicles to be equipped with headlights, brake lights, and turn signals. This isn’t just a legal requirement—it’s a safety measure to ensure visibility on the roads.
With some basic knowledge of car maintenance and a suitable light kit, you can install these lights yourself, making your golf cart street-legal.
Improved Visibility
Driving your golf cart in the evening or at night can be challenging without proper lighting. Streetlights can only do so much, and they certainly can’t illuminate every corner of your path.
Installing headlights and sidelights on your golf cart can help you navigate dark areas more safely, reducing the risk of accidents with other vehicles or animals. Plus, your lights will alert others to your presence, ensuring they can make way for you.
Vehicle Communication
Lights on a vehicle do more than just illuminate the path ahead—they also serve as a form of communication with other drivers. Brake lights and turn signals, for instance, silently convey your intentions, helping to prevent collisions.
A red brake light or a flashing turn signal is a universal language understood by drivers everywhere, making them essential for safe driving.
Step-by-Step Guide on Wiring
Installing lights on your golf cart can be a straightforward process if you follow the right steps.
Remember, the process of wiring lights on a 48-volt golf cart can vary depending on the specific light kit and golf cart model. Always refer to the instructions provided with your light kit for the most accurate guidance.
Here’s a step-by-step guide to help you through the process:
Step 1. Select the Appropriate Kit
Start by selecting a light kit suitable for your golf cart. These kits are available at specialty golf equipment stores and online. Once you have your kit, open it and ensure it contains all the necessary components. Read the instructions carefully to familiarize yourself with the installation process.
Step 2. Select the Appropriate Lights
When it comes to batteries, golf carts typically use either single or double batteries.
- Single batteries are lighter and less expensive but provide less power.
- Double batteries, on the other hand, are more costly and heavier but offer more power and longer run times.
Choose the type that best suits your golf cart usage.
Step 3. Identify the Light Installation Area
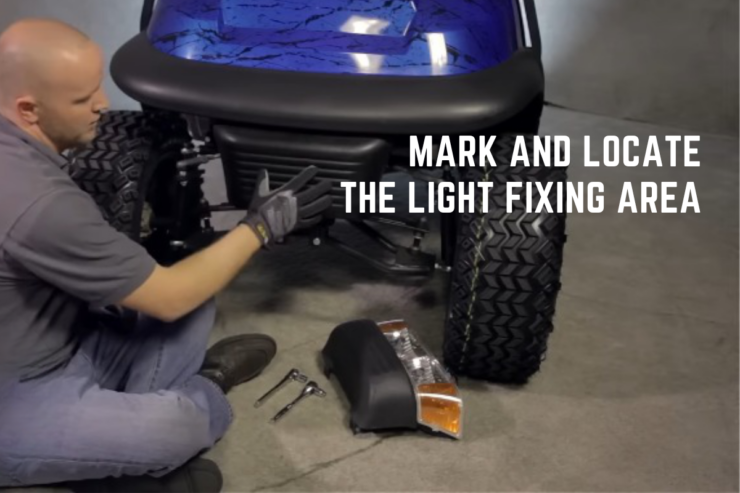
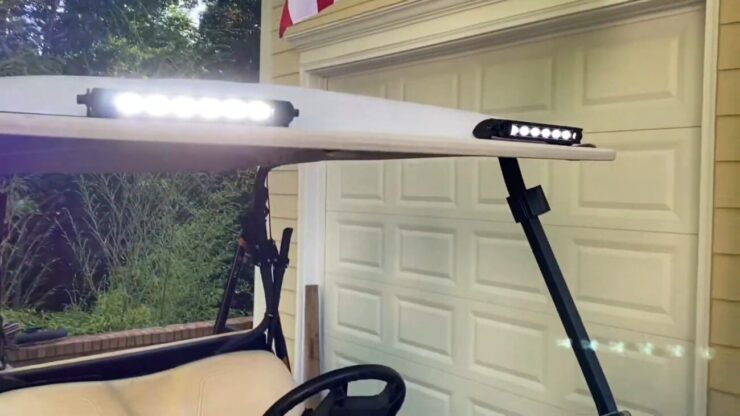
Before you begin the installation, park your golf cart and disconnect the battery. Decide where you want to install the lights. Remember, the headlights should be positioned to illuminate the road without blinding oncoming drivers.
Step 4. Screw in your headlights
Take the headlights out of the package and position them on the front of the golf cart. Follow the instructions provided in the kit for the exact positioning. Once you’re satisfied with the placement, secure the headlights using the screws provided in the kit.
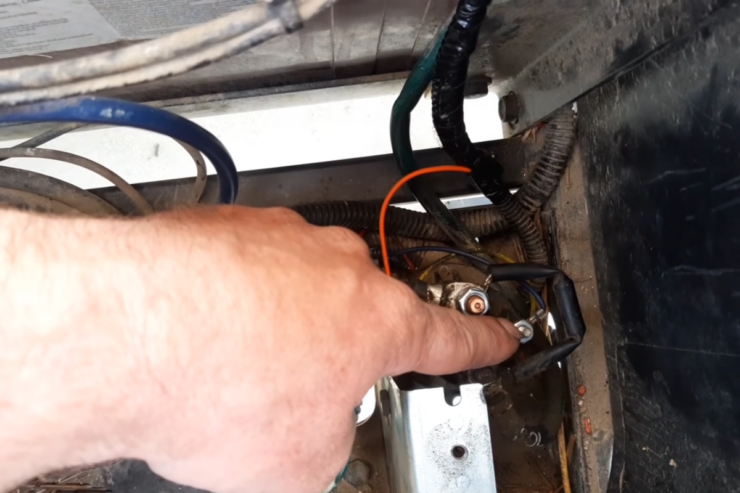
Step 5. Plugin the headlights
Attach the light mount to the golf cart. Depending on your chosen kit, you may need to drill holes for the mount or secure it to a bumper or roll bar using a tie-down accessory. Next, connect the headlight wires to the golf cart’s main electrical system.
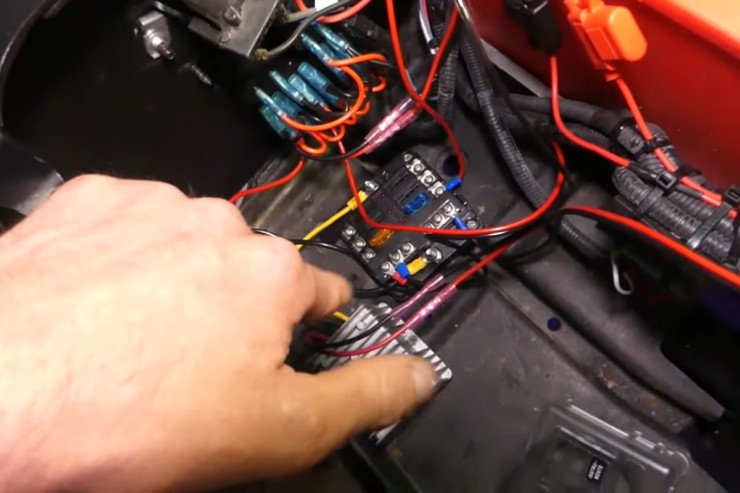
Your kit should include a set of wires with a switch on one end for turning the lights on and off. Follow the instructions provided in the kit to understand where to place these wires, as this can vary between different models and makes. Once you’ve connected the wires, secure them with cable ties.
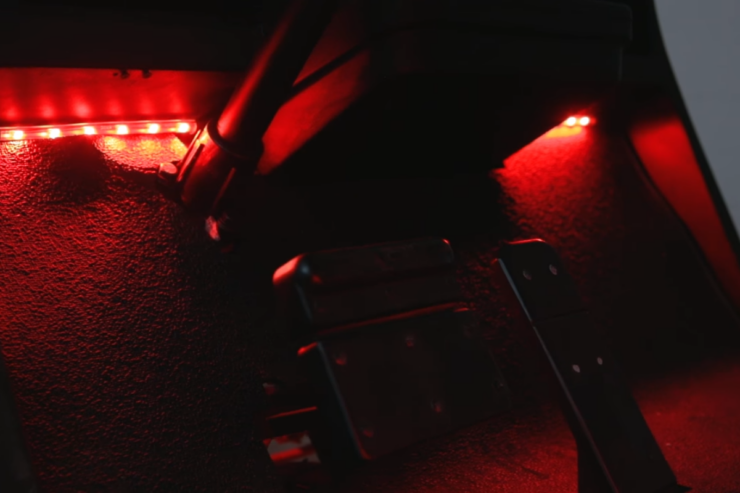
Step 6. Turn on the headlights
After installing the lights and connecting the wires, it’s time to test your battery and your new headlights.
- Reconnect the battery and turn on the lights
- Check the beam’s length and strength to ensure it’s adequate for your needs
- Adjust the angle of the lights if necessary to ensure they illuminate the road effectively without blinding other drivers.
Essential Tools 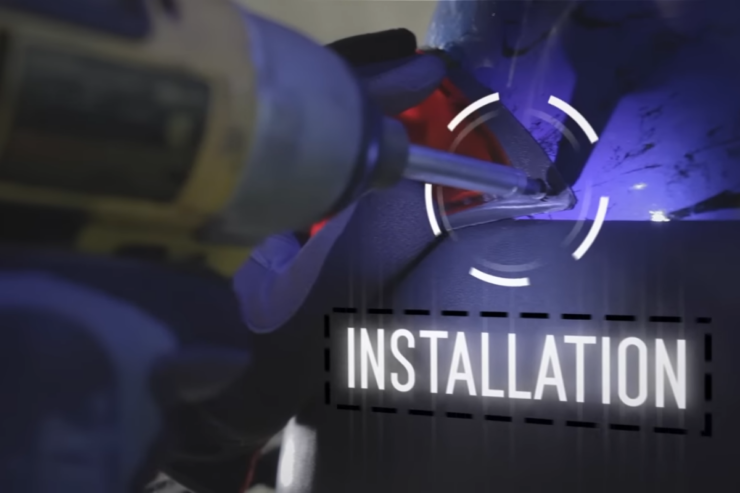
While your light kit will include the main components for installation—such as the lights, connectors, and push-pull start button—you’ll also need some additional tools to complete the job. Here’s a list of the essential equipment you’ll need:
- A 10-millimeter socket: commonly used for removing and installing nuts and bolts in automotive applications
- A 13-millimeter socket: used for handling larger nuts and bolts.
- An inch-and-a-quarter hole saw: used for drilling large-diameter holes, which may be necessary for installing the lights or running wires
- T30 and T15 Torx bits: used for driving screws with a star-shaped recess in the screw head, often found in vehicles and appliances
- A marking pen: used for marking drilling points or outlining the placement of the lights (Don’t overlook the importance of this!)
- Two cordless drills: You’ll need one with a smaller tip for precision drilling and another with a 7/16 drill tip for larger holes
- A tape measure: essential for ensuring accurate placement of your lights (Avoid drilling two holes for every one you need!)
- Safety equipment: prioritize safety when working on your golf cart! This includes wearing safety glasses to protect your eyes from debris and gloves to protect your hands
Remember, having the right tools on hand will make the installation process smoother and safer. Always refer to the instructions provided with your light kit for specific tool requirements.
Safety Precautions
When installing lights on your vehicle, safety should always be the top priority. First and foremost, before starting any electrical work, it’s essential to disconnect the battery. This step ensures that there’s no live current flowing, reducing the risk of electrical shocks.
It’s also crucial to wear the right protective gear. Safety gloves can prevent potential cuts or scrapes, and if you’re soldering wires, safety goggles are a must to protect your eyes from any splashes or debris.
Now, here are some safety precautions to keep in mind during the installation process:
Accurate Markings
The placement of your lights is crucial. Each light on your golf cart serves a specific purpose and communicates different actions to other drivers. Ensure you install them in the correct positions to provide clear and accurate signals.
Preventing Short Circuits and Faults
The lights in your golf cart are connected and secured by small connectors or sockets, similar to the light bulbs in your home. However, these connectors typically have three wires or poles to accommodate the dual-intensity illumination of the bulbs.
Be careful not to damage these connectors during installation to prevent short circuits.
Wire Differentiation
Each of the three wires in the connectors serves a different purpose. One wire carries the negative voltage or ground, while the other two control the brightness intensity of the bulb.
When changing the three-pole connector, it’s important to know how to remove the old one, disconnect and connect the new one, and ensure all three poles are correctly connected. Failing to do so may result in a short circuit.
FAQ
What voltage are golf cart headlights?
Golf cart headlights typically operate at 12 volts. This is because most golf carts use 12-volt batteries, and the headlights are designed to work with this voltage. If your golf cart uses a different voltage battery, you may need to find a compatible set of headlights.
How do you install LED strip lights on a golf cart?
Installing LED strip lights on a golf cart is a simple process that anyone can do. All you need is a few tools and supplies, and you’ll be ready to add some extra light to your cart. Naturally, gathering all the tools before you being is a must.
How to ensure the lights are operating correctly
To verify the proper operation of your golf cart lights, check the fuse box and replace any blown fuses. Also, inspect the bulbs to ensure they are not burned out. If any bulbs are burned out, they will need to be replaced.
Regular maintenance and checks will help keep your golf cart lights in optimal condition.
Wrapping Up
As the sun sets on the golf course and the path ahead blurs into the twilight, the importance of a well-lit golf cart becomes clear. Not only does it illuminate the way for those twilight rounds, but it also enhances safety, visibility, and compliance with state laws.
Whether your golf cart is powered by a series of batteries or runs on gasoline, wiring lights on it is a task that can be accomplished with confidence and ease. With a suitable light kit, the right tools, and careful attention to safety precautions, you can turn the darkness into light and make your golf cart shine bright.
So, the next time you’re enjoying a late evening round of golf, you can hop into your trusty, well-lit golf cart and navigate your way back to the clubhouse with ease.
A lifelong devotee of the sport, Kane Franco serves as a Senior Staff Writer for Florida Elite Golf Tour. His expertise, coupled with a genuine desire to assist golfers in selecting the optimal gear, has led him to oversee a team of writers dedicated to providing the most precise and insightful reviews and purchasing guidance.